

Kimber Streams
The writer covers laptops and other tech at Wirecutter for more than a decade
Even if you don’t regularly shower your mouse and keyboard with Dorito crumbs and lunch mishaps, they’ll eventually accumulate dust, skin particles, hair and natural hand oils. But less than five minutes of attention each week can keep them feeling fresh.
Mechanical keyboards need a little more TLC than other keyboards, because nasties can and will fall into the larger spaces between the keys. But a deeper clean every couple of months can keep a mechanical keyboard in top shape for years.
Once a week you should unplug your keyboard, flip it upside down and shake all the gunk out. Then wipe down the keycaps with a microfiber cloth to remove some of the oils your fingers have left behind. While the keyboard is upside down, you can also sparingly use compressed air or a keyboard brush to remove particles after you’ve shaken out the keyboard — but beware that compressed air can blow particles into your switches and make the keyboard feel gritty to type on.
For your mouse, wipe it down with a microfiber cloth to remove skin oils. Use compressed air to blow any dust or particles that have accumulated in the seams and the scroll wheel. Don’t blow air underneath the right and left clicks, since that can blow grit into the switches and cause the mouse to stop working.
If gunk builds up on the feet of your mouse or keyboard, wipe it off with a microfiber cloth or a cotton swab and use a toothpick to remove the particularly stubborn bits.
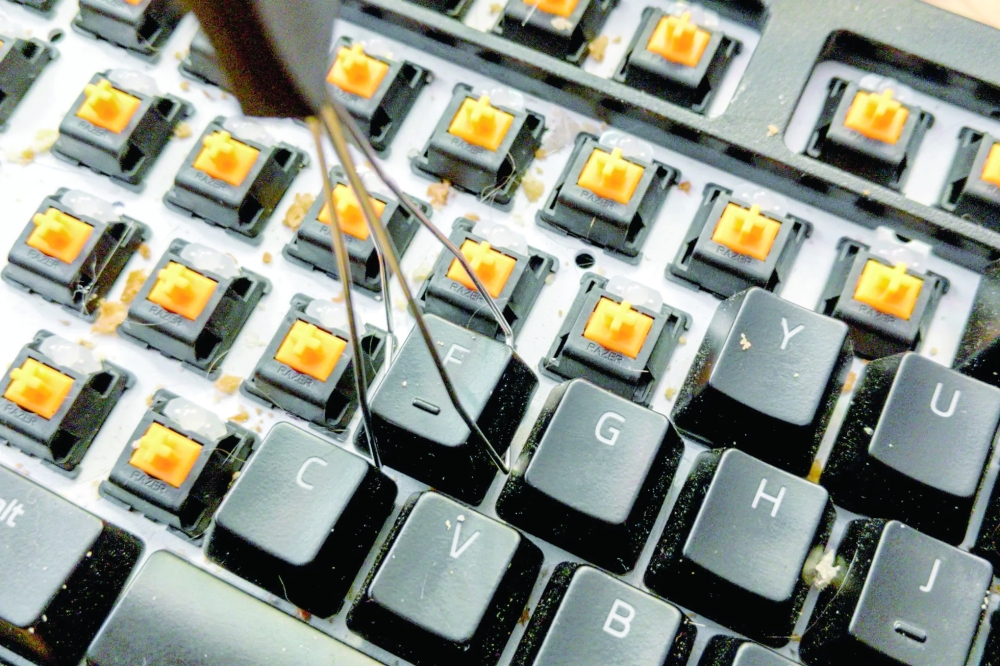
When your keyboard gets too gross — perhaps there’s debris that won’t come out when you shake it, or your keys feel slippery and smooth from hand oils — you’ll need a deeper clean. We recommend this method for mechanical keyboards only, since you can damage some other types of standalone or laptop keyboards by trying to remove the keycaps.
Use a wire keycap puller to carefully remove the keycaps by hooking the tool around the edges of each keycap and gently pulling straight up. Put the keycaps in a sealable container. Drizzle in a little Dawn soap and fill the container with hot water. Seal and gently shake the container, or just swish the keycaps around in the bowl a bit. Let them soak for at least 30 minutes.
While the keycaps are soaking, use some cotton swabs to dust out any lingering particles under the keycaps, around the switches and the stabilisers. If you have any sticky stains in there, dip the end of a cotton swab in some isopropyl alcohol and give it a scrub to break up the residue. Don’t use the isopropyl alcohol on any keycaps, on the outside of the keyboard case, or on a mouse — it can damage certain materials.
If you wipe lubricant off of the stabilisers during your deep clean, you can add a little more. Look for a silicone-based type that starts with a 92.
After the keycaps have soaked for at least 30 minutes, give them another shake or swish and then rinse them with clean water three to five times, until there’s no residue remaining. Then shake them out — I give mine a gentle toss in a plastic colander — and set them out on a towel to dry overnight. — The New York Times
Oman Observer is now on the WhatsApp channel. Click here